A plugin is available for Cyberduck that allows users to transfer files to and from BlackPearl. To get started, download Cyberduck and install it on your Windows or Mac computer.
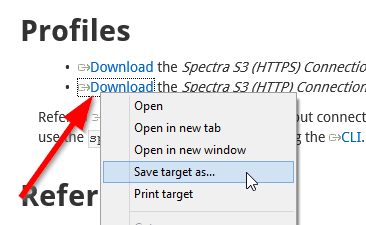
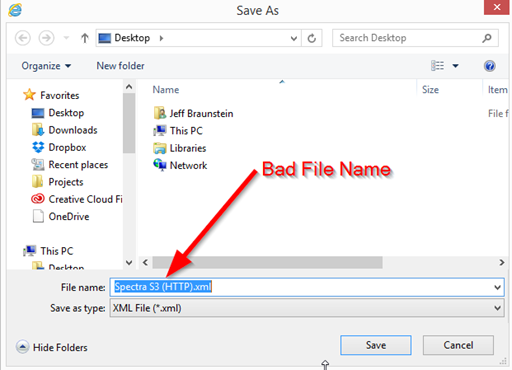
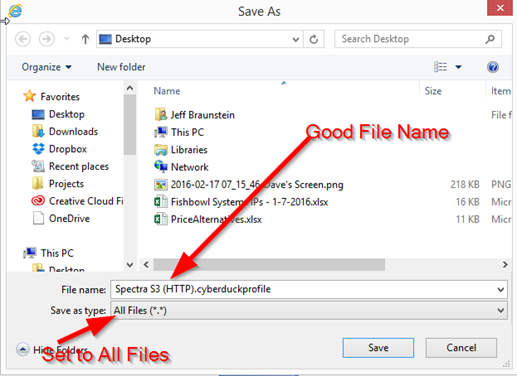
Once you have Cyberduck installed, you can download the BlackPearl/Spectra S3 connection profile/plugin for Cyberduck. Once on this page, right click (or Mac users Command-click) on the “Download the Spectra S3 (HTTP) Connection Profile” link and choose “Save Link As” or “Save Target As”. Save the file with a file name of “Spectra S3 (HTTP).cyberduckprofile”. Note: some browsers, including Internet Explorer, may try to save this file as an .xml file. It is important that you save the file name as “Spectra S3 (HTTP).cyberduckprofile” (no XML extension).
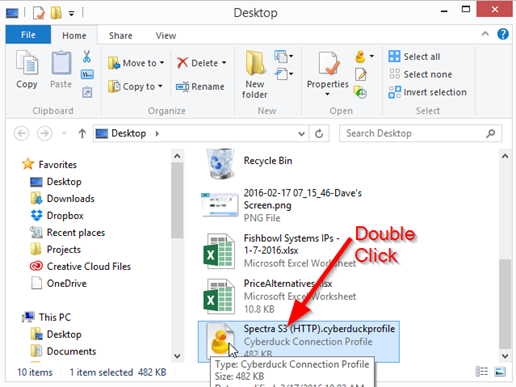
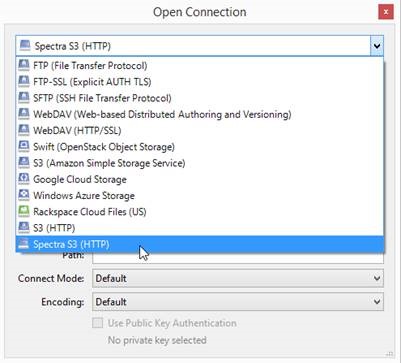
Once you download the connection profile file, double click on it in File Explorer or Finder to install it in Cyberduck. Once you have the connection profile installed, you should see it in the list of connections (File > Open Connection) in Cyberduck as “Spectra S3” (see below). You may have to restart Cyberduck if you already had it open.
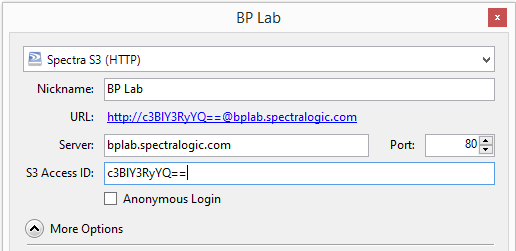
Once you choose the Spectra S3 connection type, you can enter the information of the BlackPearl you will connect to. For the Nickname field, enter a name you want to use to refer to the BlackPearl within Cyberduck. For the Server field, enter the IP address or server name of the BlackPearl data path end point. For the Port, enter the port number for the BlackPearl data path end point (typically 80 for a real BlackPearl, 8080 for the BlackPearl simulator). For the S3 Access ID, enter the Access ID of the BlackPearl user you wish to use to connect to Cyberduck. The user information is available in the BlackPearl web management interface.
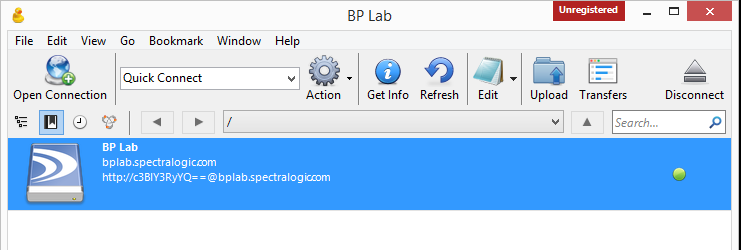
Now close the connection dialog. You should now see your BlackPearl listed as one of your connection bookmarks in Cyberduck. You can double click on the bookmark to open the connection. The first time you connect you will be asked for the Secret Key of the BlackPearl user.
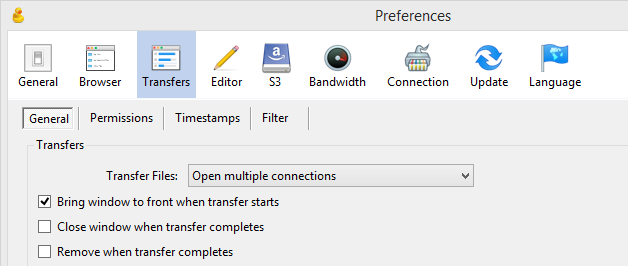
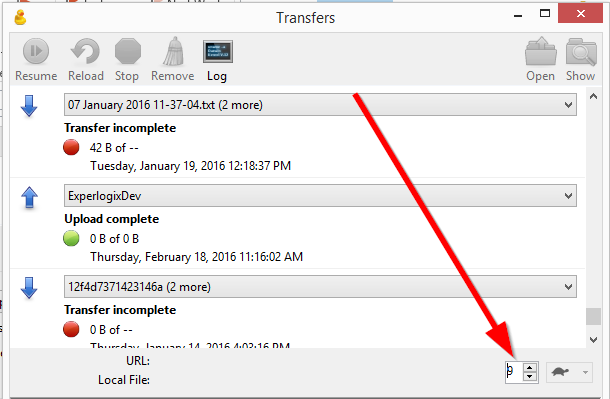
You will also want to change the Cyberduck transfer settings to allow multiple parallel transfers. First go to go to Edit > Preferences on Windows or Cyberduck > Preferences on a Mac and choose the “Transfers” section. In the “Transfer Files” drop down, choose “Open multiple connections”. Then close the Preferences dialog and go to Window > Transfers. In the Transfers window there is a number field which represents the number of parallel transfers. If you are on a 1Gb/s network, set this value to 3. If you are on a 10Gb/s network, set this value to 9.
To learn how to use Cyberduck, view the Cyberduck Help Page or read the Cyberduck Quick Reference.
If you run into problems, you may want to activate and review the Cyberduck logs. Learn how to Enable Debug Logging.
Please contact  if you have any questions or feedback.