The VMDK can be deployed either in VMWare or VirtualBox. VMWare installation instructions are available here.
VirtualBox Installation Instructions
NOTE THAT YOU MUST ALSO COMPLETE THE “CONFIGURING THE SIMULATOR” INSTRUCTIONS BELOW
Download and install VirtualBox for your appropriate platform. VirtualBox is available for Windows, Mac, and Linux. VirtualBox is required to allow the simulator, which is a Virtual Machine (VM) image, to run properly.
Once downloaded, double-click the executable and leave the defaults to install all options. You will get a warning about losing network connection temporarily. Proceed with installation and accept driver installations that appear in dialog windows.
Then start VirtualBox either immediately after finishing the installation or from the program menu or desktop icon. You will be prompted to create a “New” VM machine.
Type a name of the Virtual Machine such as “BlackPearl Simulator”.
Choose BSD as the “Type”.
Choose FreeBSD (64bit) as the “Version”.
NOTE: Make sure your computer supports Virtual Machine 64 bit setups. New computers should not be a problem, but older ones will require you to “Enable” VM support in the BIOS before installing Virtual Box so it will recognize FreeBSD (64bit) support.
Set the memory size to 2048 MB.
The next Dialog will be for the Hard Drive.
Choose “Use an existing virtual hard drive”
Browse to and choose the .vmdk image which was extracted from the zip file.
Hit “Create”.
Your VirtualBox will appear.
System Setup
In left pane of “Oracle VM VirtualBox Manager” select “BlackPearl Simulator” created above.
Choose “Settings”.
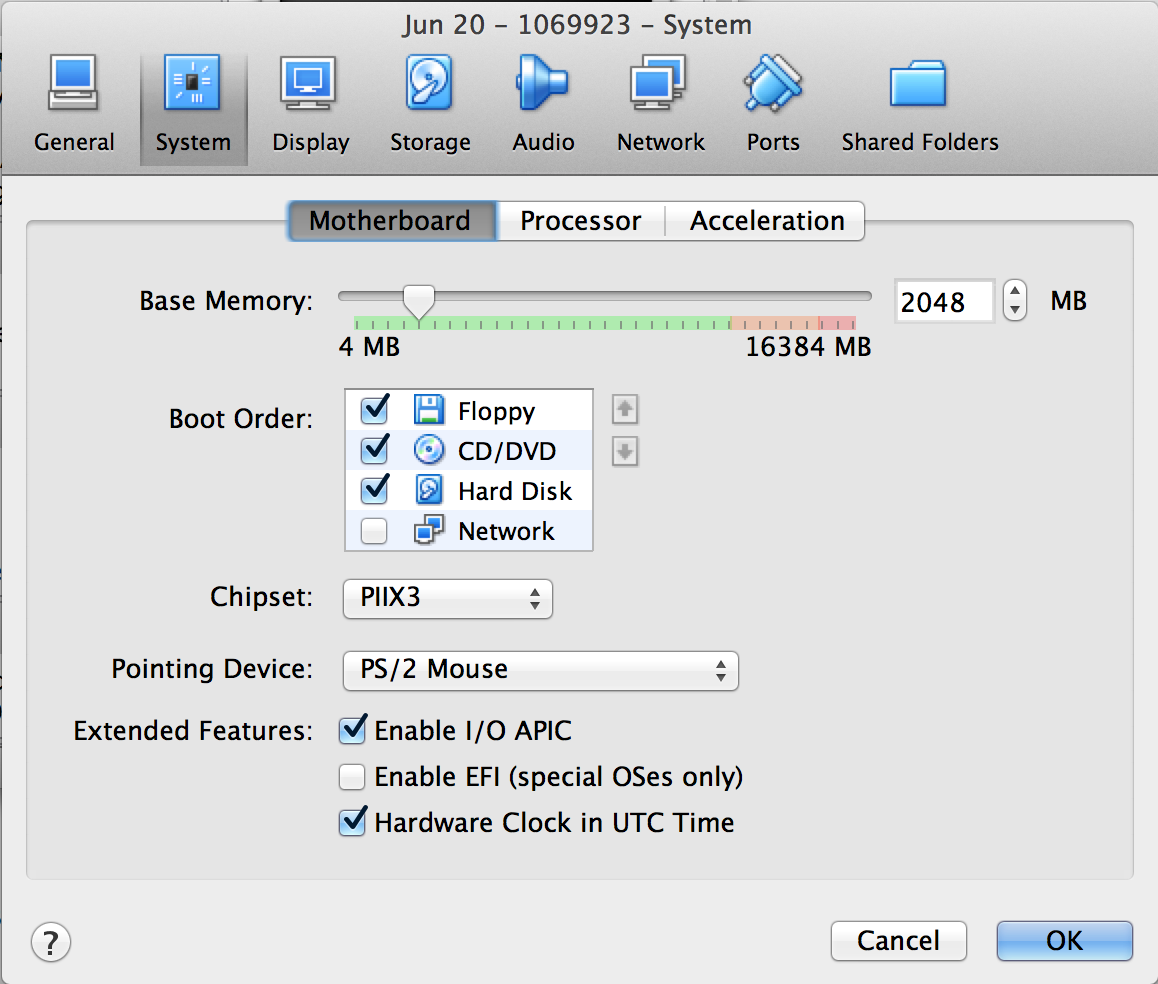
Choose “System”.
Make sure “Enable I/O APIC” is checked.
Make sure that “Hardware clock in UTC Time” is checked.
Click “OK” to save the settings.
Network Setup
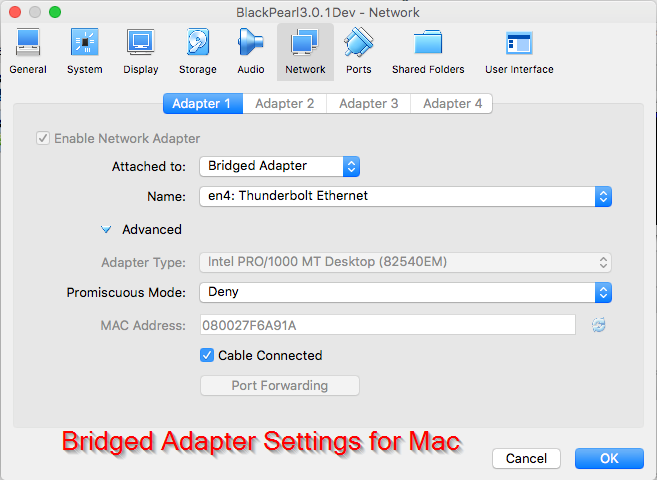
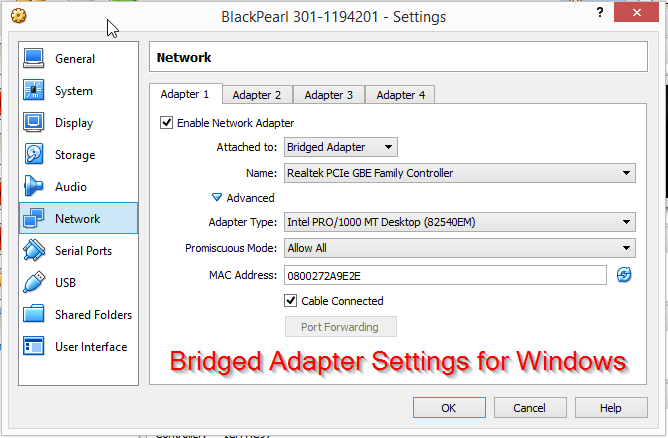
Choose “Network” from the navigation menu.
If you are only going to access the simulator from the same computer itself, you will want to use the “Host Only” network adapter. If you want to access the simulator from other computers as well, you will want to use the “Bridged” network adapter. If you are going to use the bridged network adapter, we recommend the computer be connected to the network via a hard-wired (e.g. Ethernet) connection. It may still work with a wireless connection, but we have seen some issues with network address translation on wireless networks.
Change the setting for “Attached To” to “Host-only Adapter” or “Bridged Adapter” as appropriate.
To set up the Host-Only Adapter on Mac OS X, see Steps 1-5 on the following instructions: https://forums.virtualbox.org/viewtopic.php?f=8&t=34396. For Step 5, instead of disabling the DHCP server, you should make sure that the DHCP server is enabled.
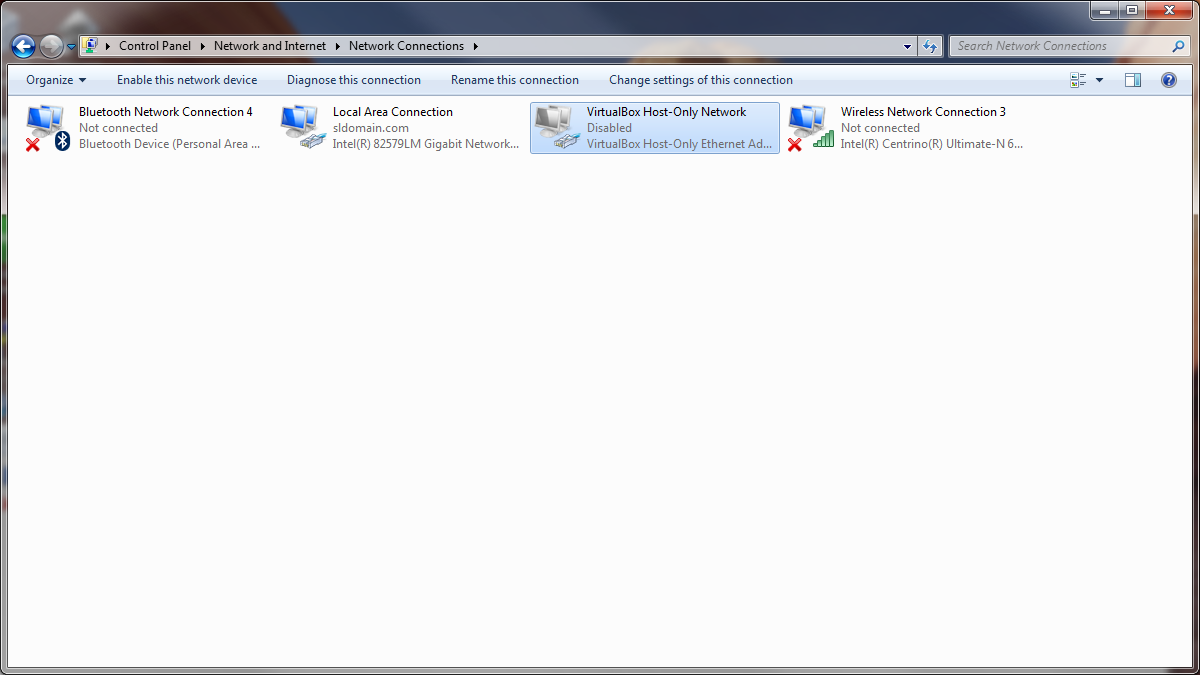
To set up the Host-Only Adapter on Windows, you will need to set up a Host Only Network on your machine. To do this, go to http://www.virtualbox.org/manual/ch06.html#network_hostonly and read the directions. Note that you may have to access the Host Network Manager as shown in the image below.

Once you’ve set up a new adapter network, you can set your VM Network to use that network that you just created.
NOTE: For Windows, you may need to enable/disable the Virtual Box Network Adapter under Network Connections to get wireless internet access. Enable for running the simulator, disable when not using the simulator.
NOTE THAT YOU MUST ALSO COMPLETE THE “CONFIGURING THE SIMULATOR” INSTRUCTIONS BELOW
Starting the Simulator
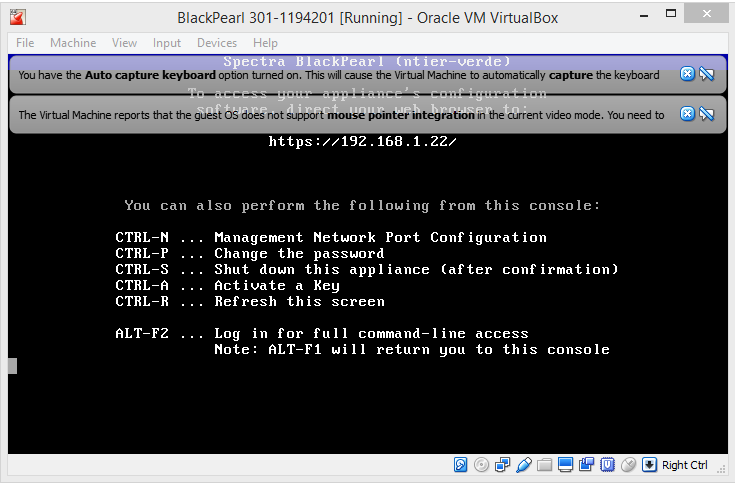
To start the simulator, choose “Start” in upper left area. You will get a warning dialog about keyboard capture going to the VM. That’s normal. You may also get a warning about mouse capture for the VM window. That’s normal too. Read the information in the screen to use your mouse within the VM window or back on your main computer screen. The “RT CTRL” key will toggle the mouse control from the VM back to the main computer screen.
Once the VM window shows the BlackPearl Console UI screen, use the IP listed to have your computer browser bring up the web interface for BlackPearl, e.g. https://192.168.1.22
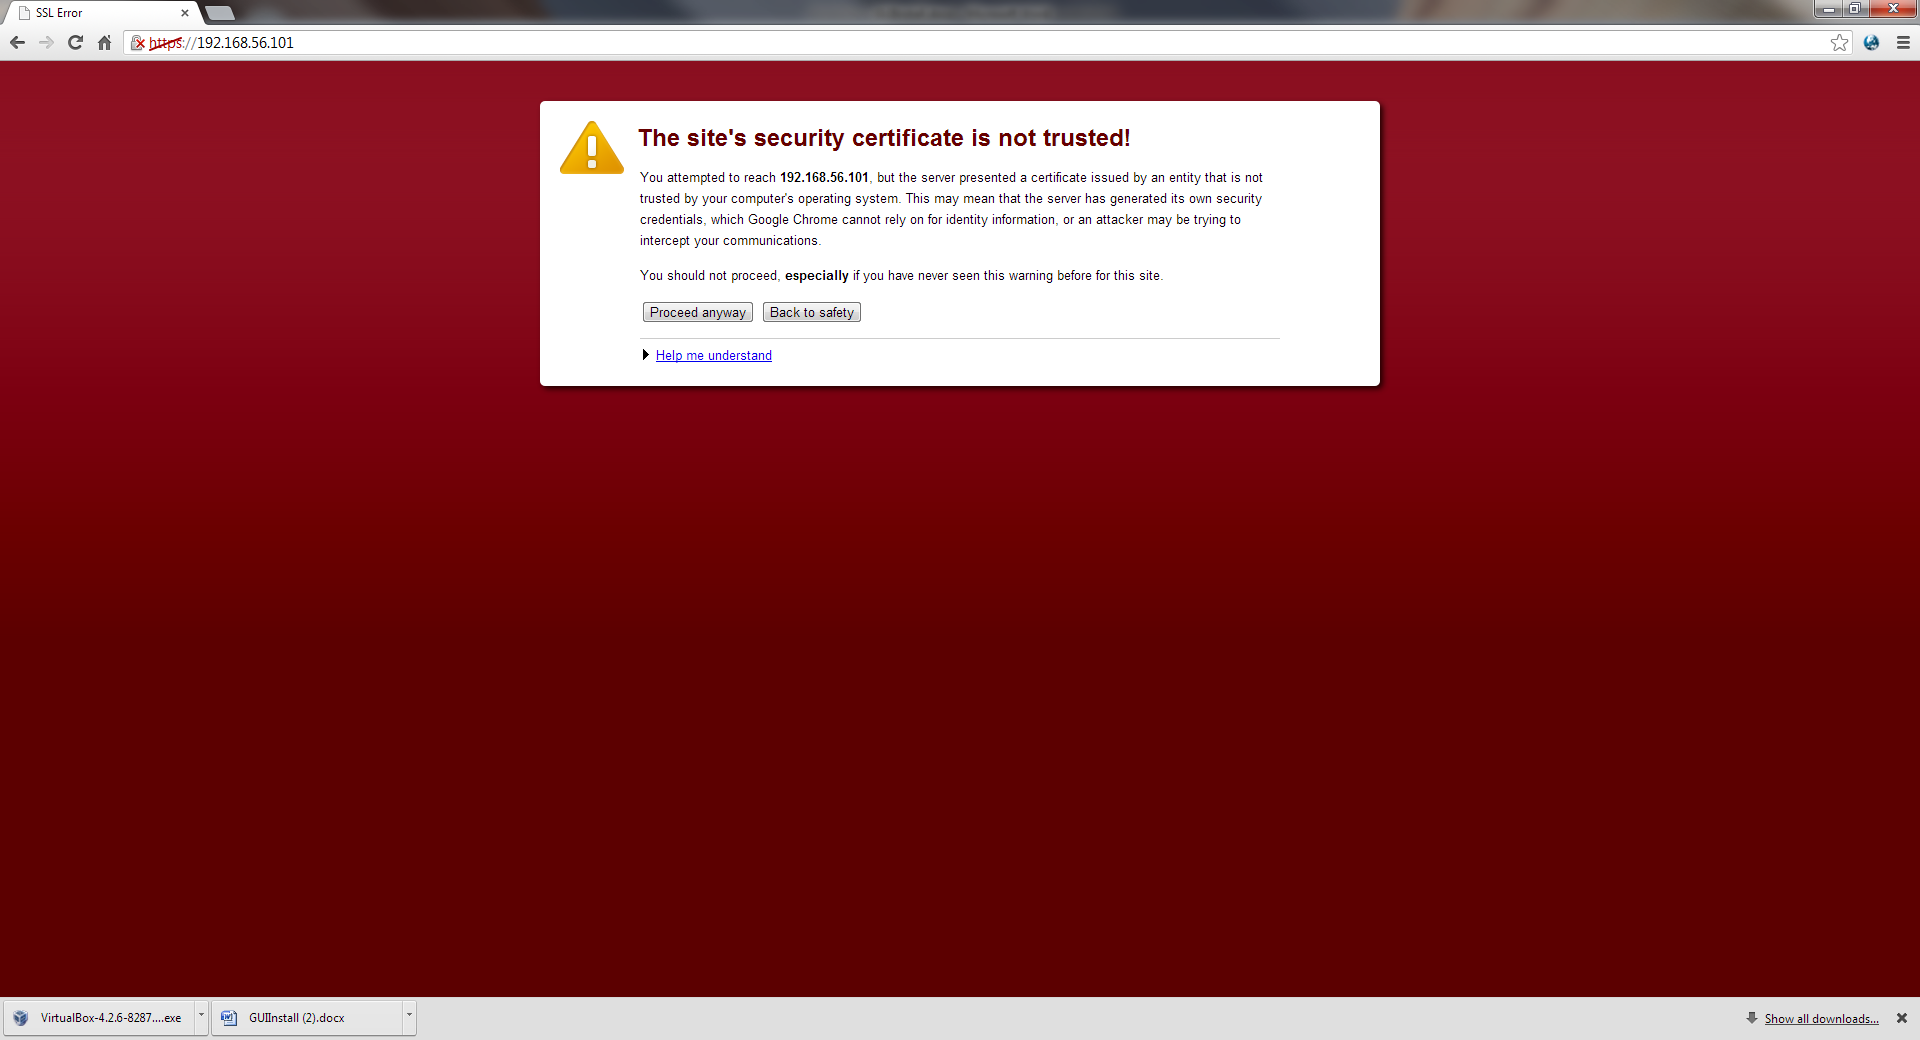
You will see a screen warning that the page is insecure. Choose “Proceed anyway” or “Advanced” > “Proceed…”. You will end up at the BlackPearl login screen. Log in using Administrator/spectra as the username/password.
Configuring the Simulator
Log into the web interface for BlackPearl as described above. On the initial login, the product name “Verde” will be displayed instead of “BlackPearl”. This will change once the activation key is entered.
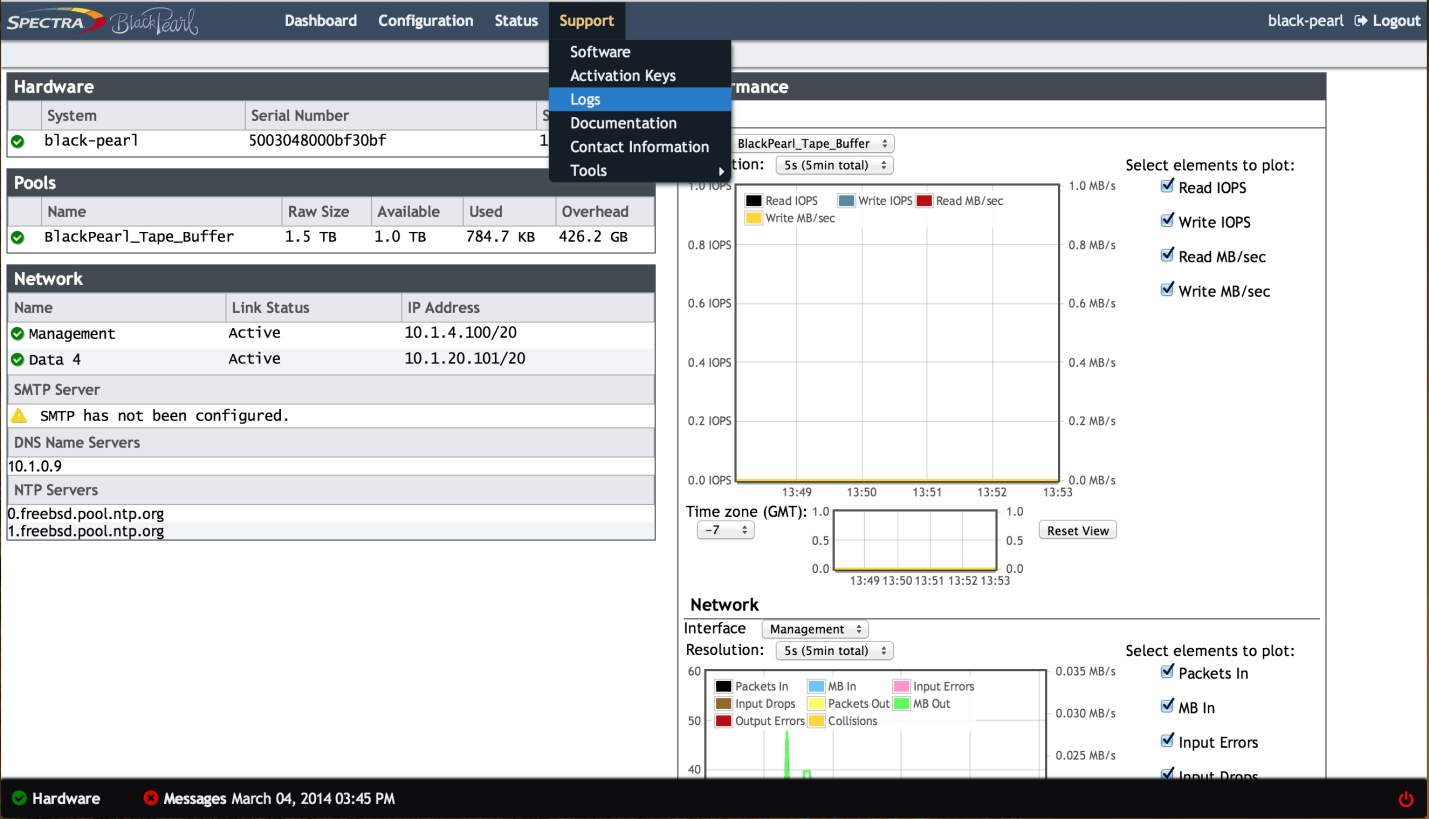
Go to Support > Activation Keys
Click on Action > New
Enter the following key: VWY 2C5 8M7 5DF R7Q
Then press Create
Click on Action > New again
Enter the following key: 24G M7E QUZ 5XS 5QY
Then press Create
Click on Action > New again
Enter the following key: FHP VCN Z3E Y8V 99B
Then press Create
Click on Action > New again
Enter the following key: 4AC 9Q4 SW7 PBN 3F7
Then press Create
Click on red power icon in lower-right corner of screen (red circle with line). Click on “Reboot”, then “Reboot” again.
Wait a few minutes. You should be redirected to the login page. Log in again.
Go to Configuration > Advanced Bucket Management > Storage & Policy Management. Single click on the tape partition “Partition #1.” (may take a few minutes for the partition listing to appear). Click on Action > Activate Tape Partition and press the activate button in the popup box. Repeat process for Partition #2 and Partition #3 if they are listed.
Go to Status > Tape Management. Then go to Action > Format All Unmanaged Tapes. Click on the Force checkbox, type in FORMAT, and then press “Format All Unmanaged Tapes” button.
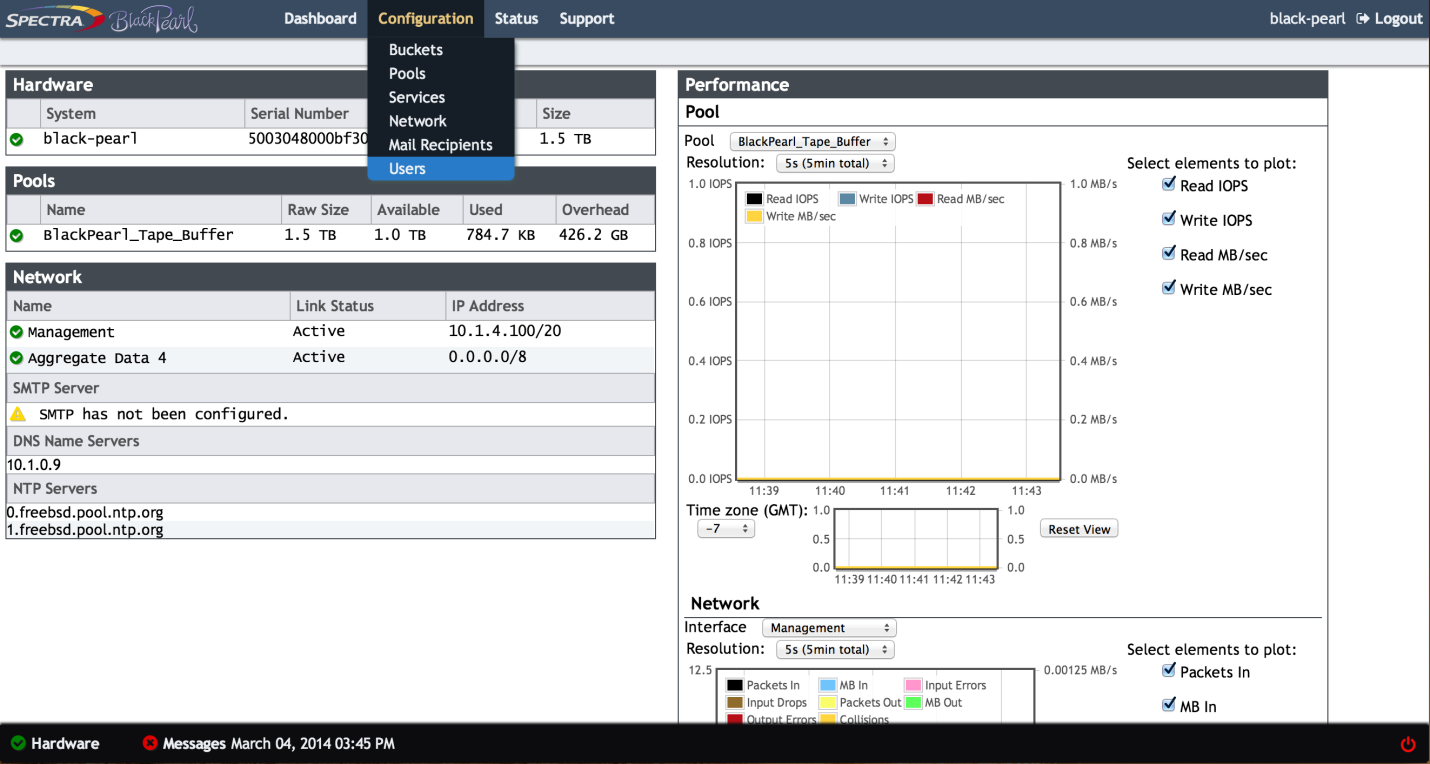
Now go to Configuration > Users. Single click on the “Administrator” user, and then go to Action > Edit. Set the Default Data Policy to “Single Copy on Tape” or “Dual Copy on Tape”. For all other new users you create, you must also set their Default Data Policy.
Simulator Web Interface Limitations
A user can use most of the features in the web interface that are available on a live system. There are some caveats.
- The performance graphs are “canned” statistics.
- The web interface shows fake network interfaces to match a real system. You cannot see the status of the VM’s network interface nor can you configure it from the web interface.
- Don’t change the network settings for the management port.
Additional VM Notes
- The VM image size is set up to be 20GB which means you’ll have about 17GB available for uploading objects if you have 17GB additional space available in the local storage that the .vmdk image is running. The image will grow as objects are uploaded to the BlackPearl simulator.
- The VM only has a single network interface. Port 80 is used for management GUI, port 8080 is the Spectra S3 server. It’s configured for DHCP. Specify port when communicating with simulator.
- The console app shows the real IP address of the network interface. It cannot be configured via the console app.
Using the BlackPearl Web Interface
Creating a new user:
1) Select Configuration->Users from the top menu
2) Select New from the Action menu
3) In the “New User” panel, fill out the fields, including “Default Data Policy.” Click “Create.”
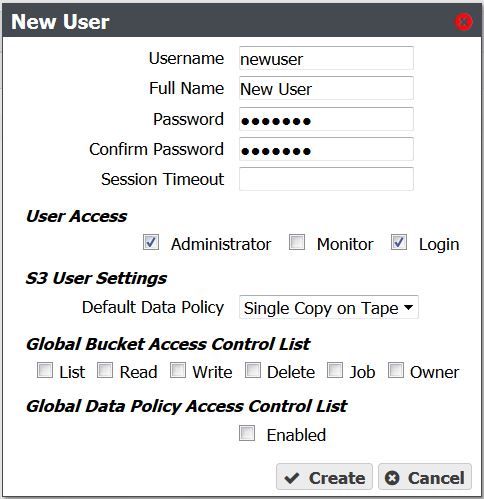
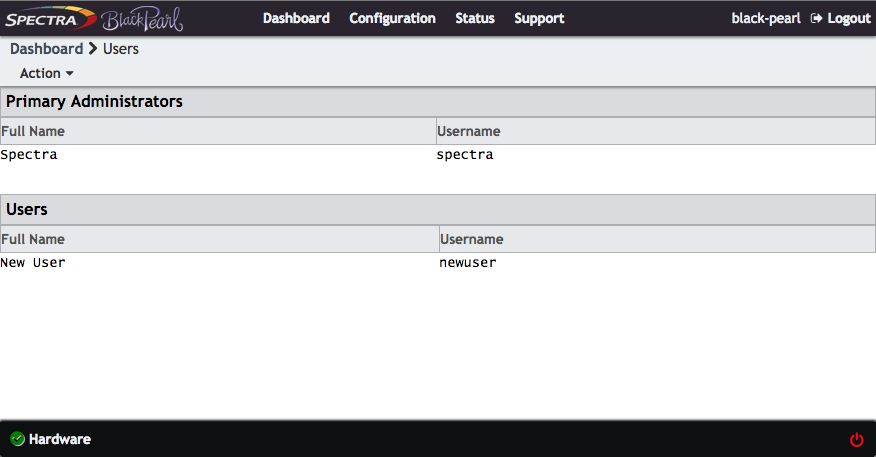
4) You should see your new user in the list of Users, for example:
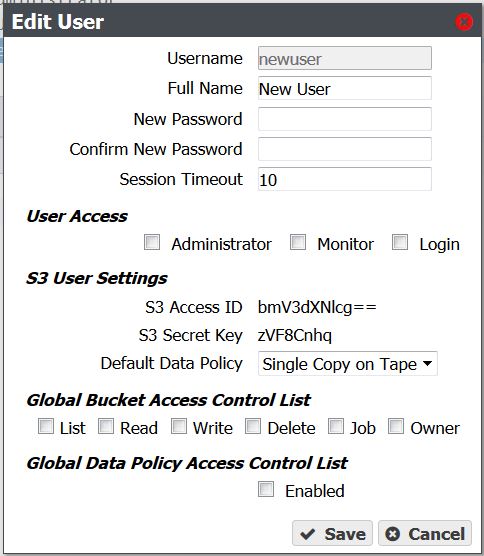
5) In order to view and edit the S3 credentials for a user, double click on the specific user and you will see the following:
6) You may also just view the S3 credentials by highlighting the user and then going to “Action”->”Show S3 Credentials” which will display something like the following:
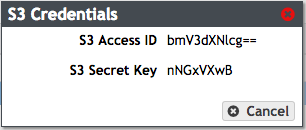
7) As shown above, the S3 Access ID and S3 Secret Key are created for that new user. If you would like to put buckets and objects for that user account, please use the corresponding Access ID and Secret Key.
NOTE: At this time, if you do not use the spectra user account for putting buckets and objects, you will not be able to see them in the following display. Only (at present) will buckets and objects be displayed for the spectra user account in the Object Browser (see below).
Accessing the Simulator with a BlackPearl Client -- Use 8080 for Port Number
If you want to access the simulator with a BlackPearl client such as the Eon Browser, you will need to provide the Data Path Address and Port. For the Data Path Address, enter the same IP address you used to access the web management interface in your web browser. Use 8080 for the port number.
Bucket/Object Browser
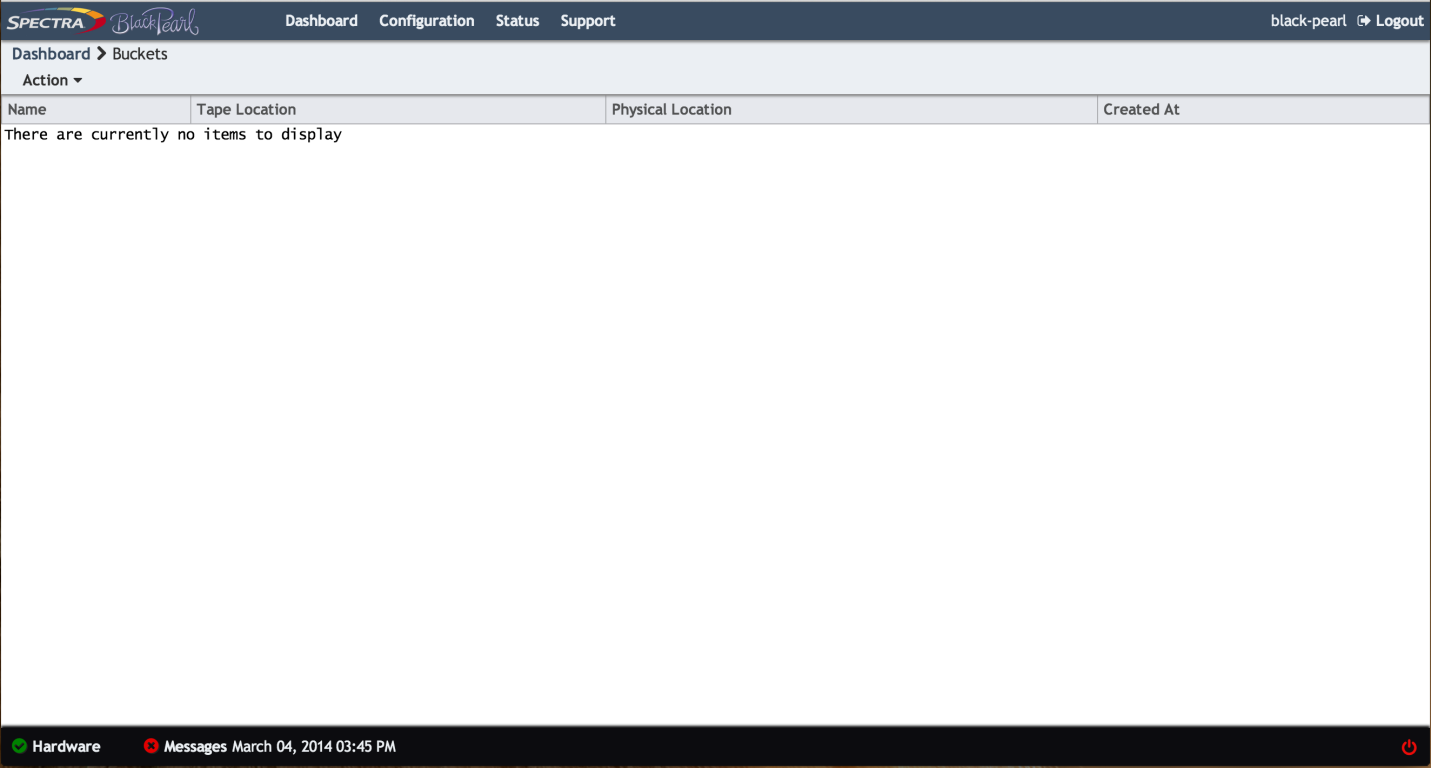
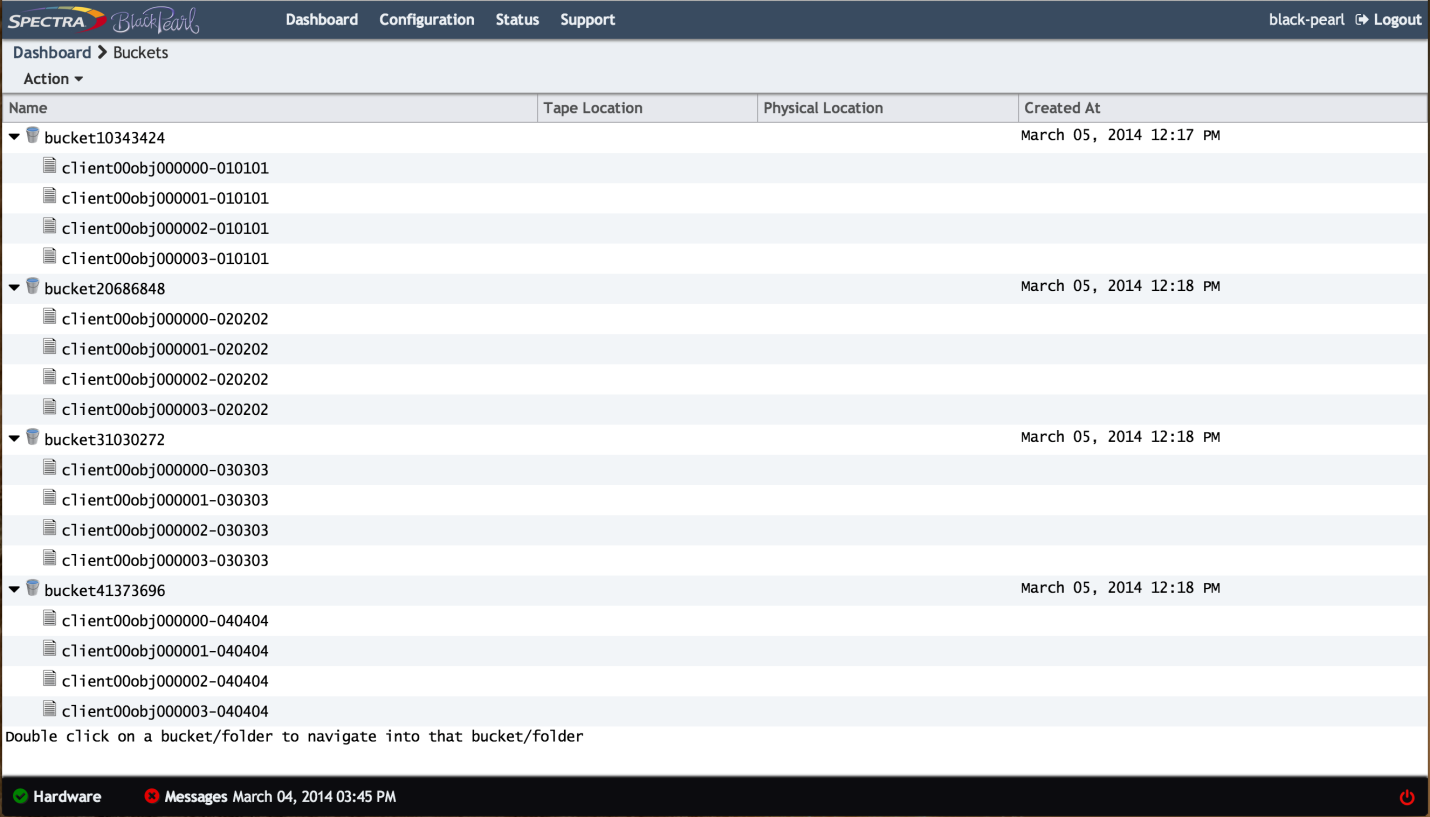
1) Select Configuration -> Buckets from the top menu

2) Initially, there will not be any buckets or objects to display
3) After using the “Spectra” user to perform some PUT commands to create buckets and upload objects into buckets, the object browser will allow visibility to those items, as follows: (please see the NOTE about using the spectra user in the prior section)
Generating and pulling Support Logs
1) Select Support -> Logs from the top menu
2) Select “New Log Set” from the Action menu

3) Indication on the page will show that it is creating a new log set

4) When finished, highlight the log set by clicking on it, then go to Download in the Action menu
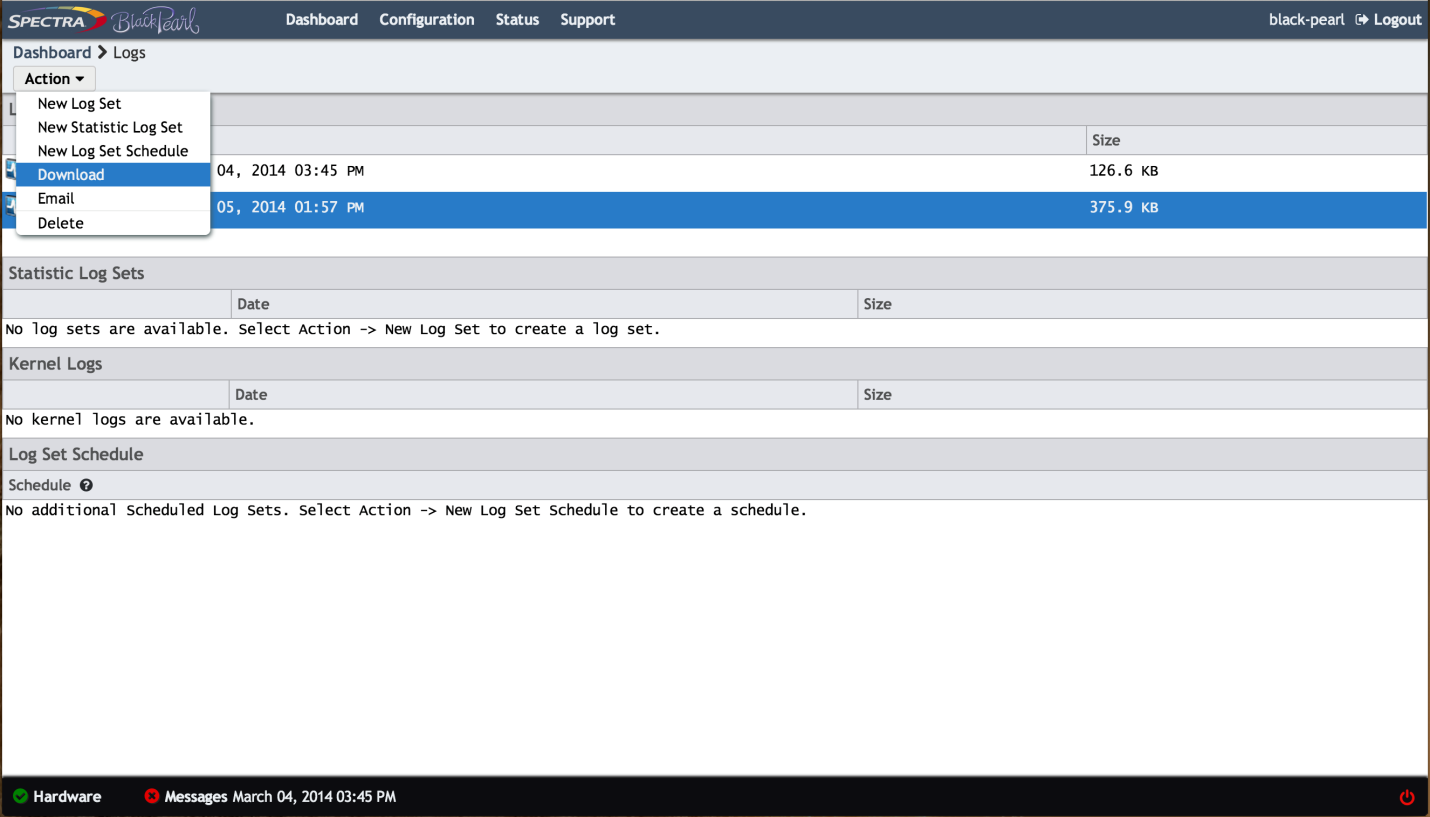
5) The log set zip file will begin downloading to your browser’s download area. The .zip files can vary in size.